

Cloudy, yellow headlights can make an otherwise well-kept vehicle look years older. More importantly, once a headlight lens becomes heavily oxidized, simply polishing the surface may not be enough to provide a lasting improvement.
Jonathan with Absolute Precision Custom Detailing worked on the headlights of a 2014 Chevy Equinox that showed years of sun exposure, oxidation, rock chips, and general wear.
As Jonathan explains in the video:
“What it is is the clear coat that the factory puts on has baked in the sun and has this yellow haze and oxidation.”
Rather than simply polishing the headlights until they looked clear again, Jonathan went through a multi-step headlight restoration process to remove the deteriorated coating, prepare the lens, and apply new UV protection.
Watch the Headlight Restoration Process
In the video below, Jonathan walks through the restoration from start to finish, including why the headlights become oxidized, how he sands away the failed coating, why weather conditions matter, and how he applies a new UV-protective clear coat.
What Causes Headlights to Turn Yellow and Cloudy?

Modern headlight lenses are typically made from polycarbonate plastic. Because the material is constantly exposed to sunlight, weather, road debris, washing, and environmental contamination, manufacturers protect the lens with a UV-resistant coating.
Over time, that protective surface can deteriorate.
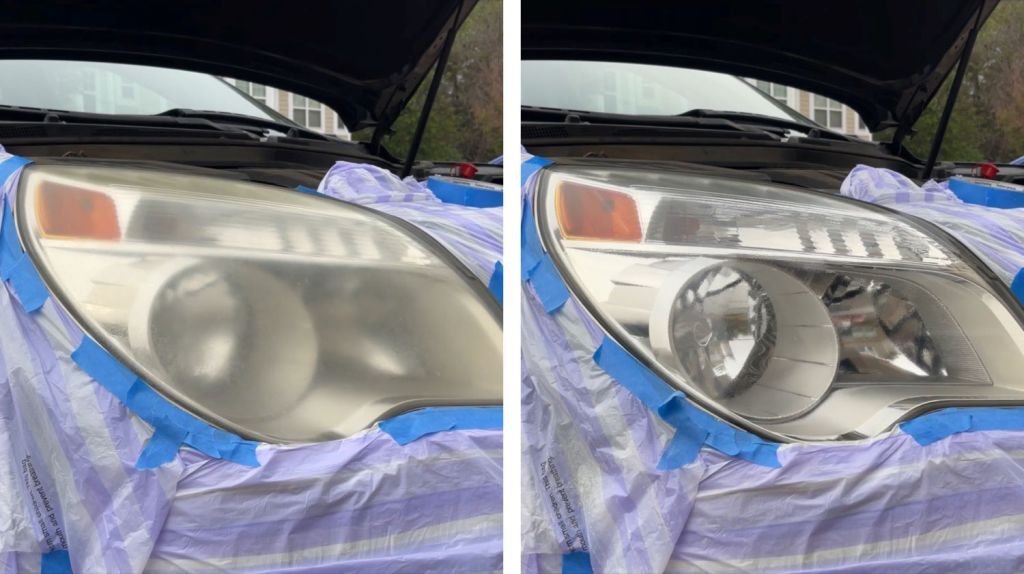
On the Equinox in Jonathan’s video, you could actually feel how rough the lens had become. The headlights also showed heavy oxidation, yellowing, rock chips, and other signs of age.
Once that protective coating begins breaking down, the lens can develop the familiar cloudy or yellow appearance many drivers notice on older vehicles.
Can You Just Polish Oxidized Headlights?
Sometimes polishing can make an oxidized headlight look significantly better. The problem is how long that improvement lasts.
As Jonathan explains:
“You can polish them, but the results will not last.”
A cutting compound and machine polisher can remove some of the oxidation and temporarily improve clarity. But if the original UV coating has already deteriorated, polishing alone doesn’t replace the protection that has been lost.
That means the headlight may begin oxidizing again.
For a more complete headlight restoration, the damaged surface needs to be addressed before new protection is applied.
Step 1: Protecting the Paint Around the Headlight

Before sanding begins, Jonathan carefully tapes and masks the areas surrounding the headlight.
There are two important reasons for this.
First, the restoration process creates sanding dust that you don’t want spreading unnecessarily across the vehicle.
More importantly, masking helps protect the surrounding painted surfaces from accidental contact with the sandpaper.
As Jonathan points out, accidentally sanding the paint turns a headlight restoration into an entirely different problem requiring paint correction.
Careful preparation may not be the most exciting part of the job, but it is an important part of doing it correctly.
Step 2: Cleaning the Headlight Before Sanding
Before touching the lens with sandpaper, Jonathan cleans it with a panel-preparation product.
Isopropyl alcohol and distilled water can also be used for this step.
The goal is to remove dirt, oils, and contamination before sanding begins.
This matters because debris left on the lens can become trapped between the sanding surface and the headlight.
“When you sand and polish, you don’t want to have dirt and debris and things like that because what will happen is you’ll actually grind that into the surface.”
Starting with a properly cleaned surface gives us much more control over the restoration process.
Step 3: Removing the Failed Clear Coat and Oxidation
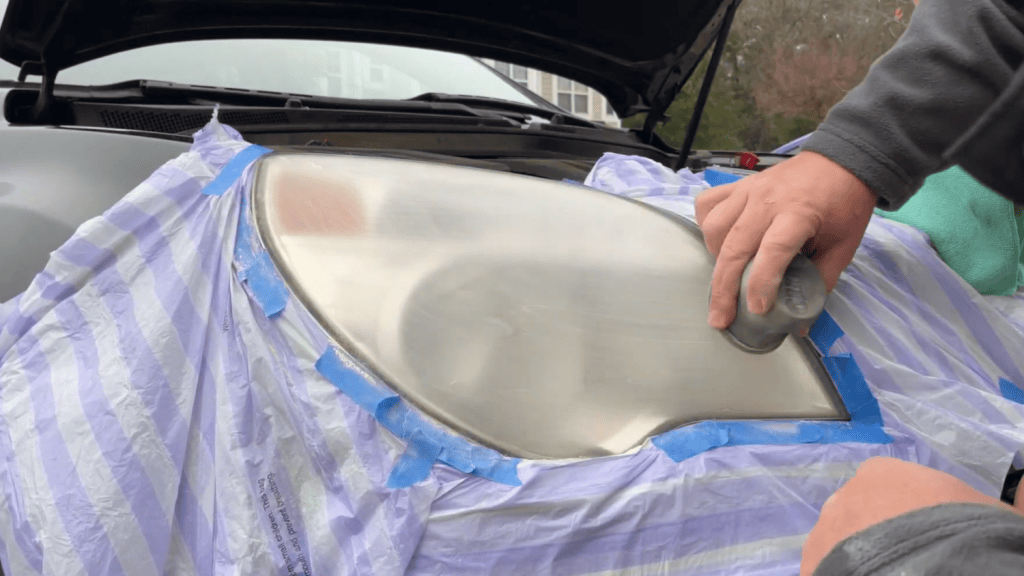
This particular headlight required an aggressive starting point because of the amount of deterioration.
Jonathan begins with 400-grit sandpaper on a three-inch pad.
He also uses a soft foam interface rather than a rigid sanding block. The foam can better conform to the curves of the headlight lens and helps provide more consistent contact with the surface.
At this stage, the headlight actually looks worse before it looks better.
That’s expected.
The goal isn’t to immediately create a shiny lens. We’re removing the failed clear coat and oxidation so we can create a properly prepared surface.
During the video, you can actually see the old coating coming off onto the sanding pad.
Step 4: Refining the Headlight With Finer Sandpaper
After the initial sanding removes the deteriorated coating, Jonathan moves to a finer 1500-grit abrasive.
This stage begins refining the deeper sanding marks left by the more aggressive first step.
But technique matters.
Sanding residue can build up on the abrasive and create small lines or defects across the lens. Jonathan stops frequently to clean the surface and inspect his sanding pad.
“If you stop every 15 to 30 seconds and wipe them off, then it’s not so bad.”
If debris begins accumulating on the pad, he replaces it rather than continuing to drag that material across the headlight.
The objective is to leave the lens uniformly prepared without sanding debris creating defects that could become visible underneath the new coating.
What About Rock Chips and Cracks?
Headlight restoration can dramatically improve oxidation and yellowing, but it can’t make every type of damage disappear.
The Equinox in this video already had rock chips and even a crack in one of the headlights.
Those are physical defects in the lens itself.
A professional restoration can improve the overall clarity and appearance of an aging headlight, but it doesn’t replace a damaged lens. Deep cracks, severe pitting, internal moisture, or significant physical damage may eventually require headlight replacement.
That’s why we look at the actual condition of the headlights before deciding what level of restoration makes sense.
Step 5: Cleaning and Drying the Lens Again
After sanding is complete, all remaining dust and residue need to be removed.
Jonathan cleans the lens again with surface prep and makes sure it is completely dry before applying the new clear coat.
And completely dry matters.
This particular restoration had actually been scheduled for the previous day, but heavy rain and humidity caused Jonathan to postpone it.
Even though Absolute Precision Custom Detailing is mobile and can work beneath a canopy, certain detailing processes depend on the environmental conditions.
Jonathan explains that applying the headlight coating in excessive humidity can cause the product to become gummy and produce a poor finish.
Knowing when not to perform a process is just as important as knowing how to perform it.
Step 6: Applying UV-Protective Headlight Clear Coat
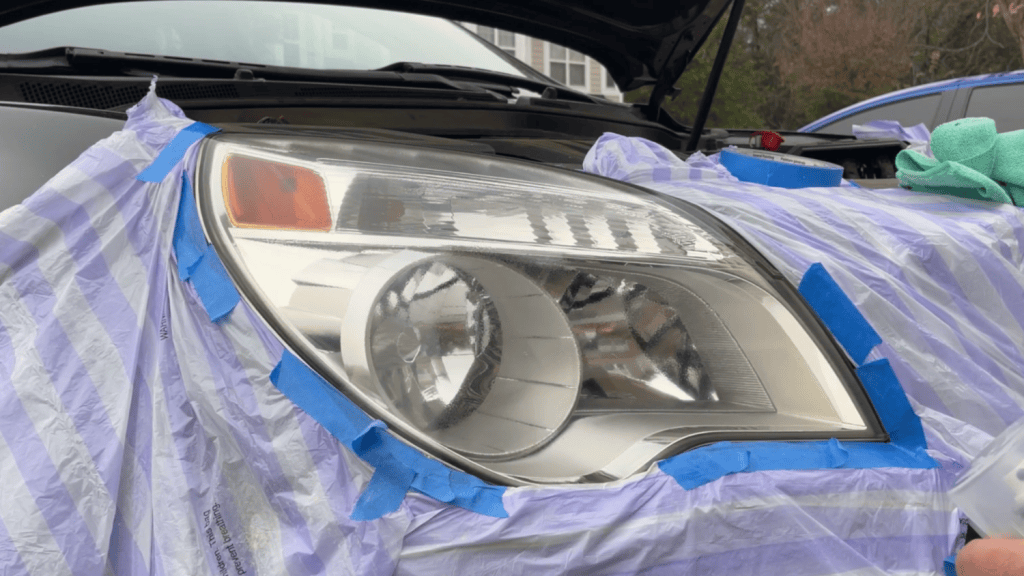
Once the old damaged coating is removed and the lens is properly prepared, Jonathan applies a dedicated headlight lens clear coat with UV protection.
This is the step that separates this process from simply polishing a cloudy headlight.
The coating is applied in steady passes from approximately six to eight inches away from the lens. Jonathan avoids repeatedly going back over areas while the coating is wet and allows the product’s self-leveling properties to work.
He also stresses the importance of using a product specifically designed for headlight lenses.
“Don’t skimp on this stuff. Get the real stuff.”
The purpose isn’t simply to make the headlight look shiny when the job is finished. The new coating helps restore UV protection to the freshly prepared lens.
Why Professional Headlight Restoration Is More Than a Quick Polish
There are plenty of DIY headlight restoration kits available, and some can create a noticeable short-term improvement.
But there’s an important difference between making a headlight look clearer and properly addressing a deteriorated lens.
On a heavily oxidized headlight like the one shown in Jonathan’s video, our process can include:
-
Protecting the surrounding painted surfaces
-
Thoroughly cleaning the lens
-
Removing deteriorated factory coating and oxidation
-
Progressively refining the surface
-
Continually inspecting and cleaning during sanding
-
Preparing the lens for recoating
-
Applying a dedicated UV-protective headlight clear coat
-
Allowing the coating to properly level and cure
It’s a process, not a wipe-on shortcut.
Mobile Headlight Restoration in the Charlotte and Fort Mill Area
Absolute Precision Custom Detailing provides professional mobile detailing throughout the Charlotte and Fort Mill area.
Jonathan brings professional detailing experience directly to the vehicle, whether we’re correcting paint, deep cleaning an interior, applying ceramic protection, or restoring oxidized headlights.
If your headlights have become cloudy, yellow, or heavily oxidized, we can evaluate their condition and determine whether professional headlight restoration is a good option.
Ready to improve the look of your headlights? Contact Absolute Precision Custom Detailing to ask about mobile headlight restoration and detailing services in the Charlotte and Fort Mill area.
Prefer to chat first? No problem, Contact Us Here or Call us at 704-654-2042


